Prime Optics Academy
****UNDER CONSTRUCTION****
Week 1
Seeing Like a Photographer
Students will begin their photography journey by learning the fundamentals of photography and how to see a photograph before taking it. They will receive a brief introduction to the history of photography, learn the basic parts and functions of a DSLR or mirrorless camera, and explore the difference between automatic and manual shooting modes.
The primary focus will be composition. Students will learn techniques such as the Rule of Thirds, Golden Ratio, leading lines, framing, perspective, and subject/background separation (depth of field). They will then put these concepts into practice by photographing a variety of subjects.
The goal of Week 1 is to help students understand that photography starts with how you see and compose an image.
Week 2
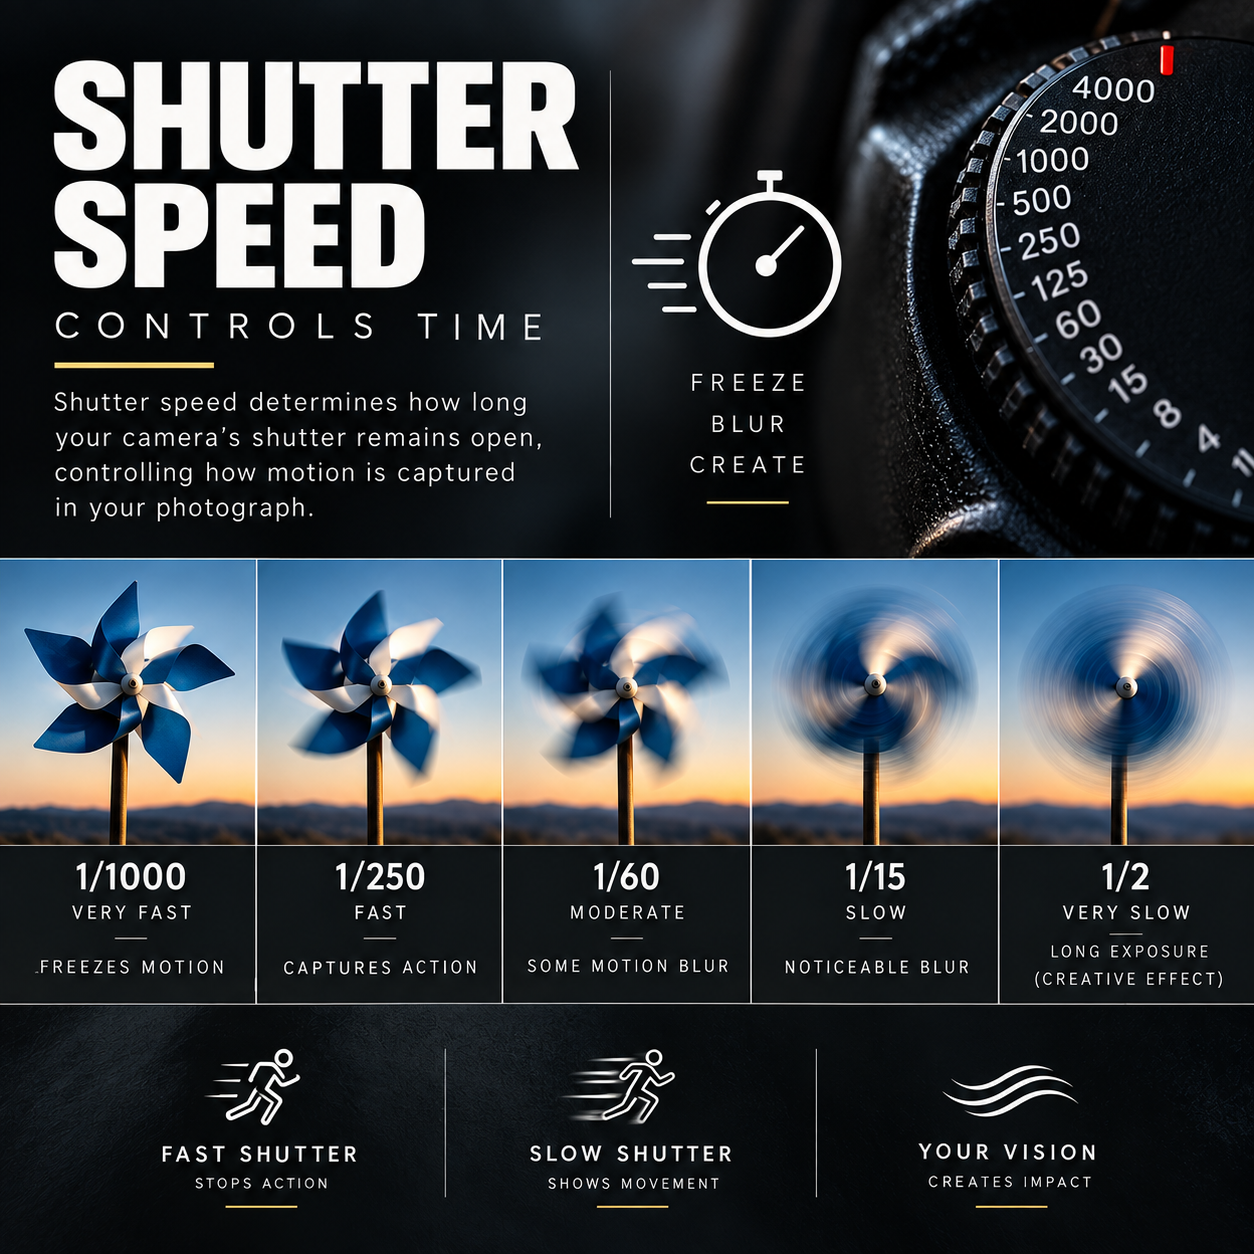
Shutter Speed - How does time affect a photograph?
Students will learn how shutter speed controls the amount of time the camera’s shutter remains open and how it affects the appearance of motion in a photograph. They’ll explore the differences between fast and slow shutter speeds and learn when to use each.
Students will practice freezing action, creating motion blur, reducing camera shake, and using motion creatively. They’ll also learn when and why to use a tripod, particularly when working with slower shutter speeds or situations where keeping the camera steady is important.
Through hands-on exercises, students will photograph moving and stationary subjects using a variety of shutter speeds. Allowing them to see firsthand how changing one camera setting can dramatically change an image.
The goal of Week 2 is to help students understand that shutter speed is a creative tool for controlling and capturing motion.
Week 3
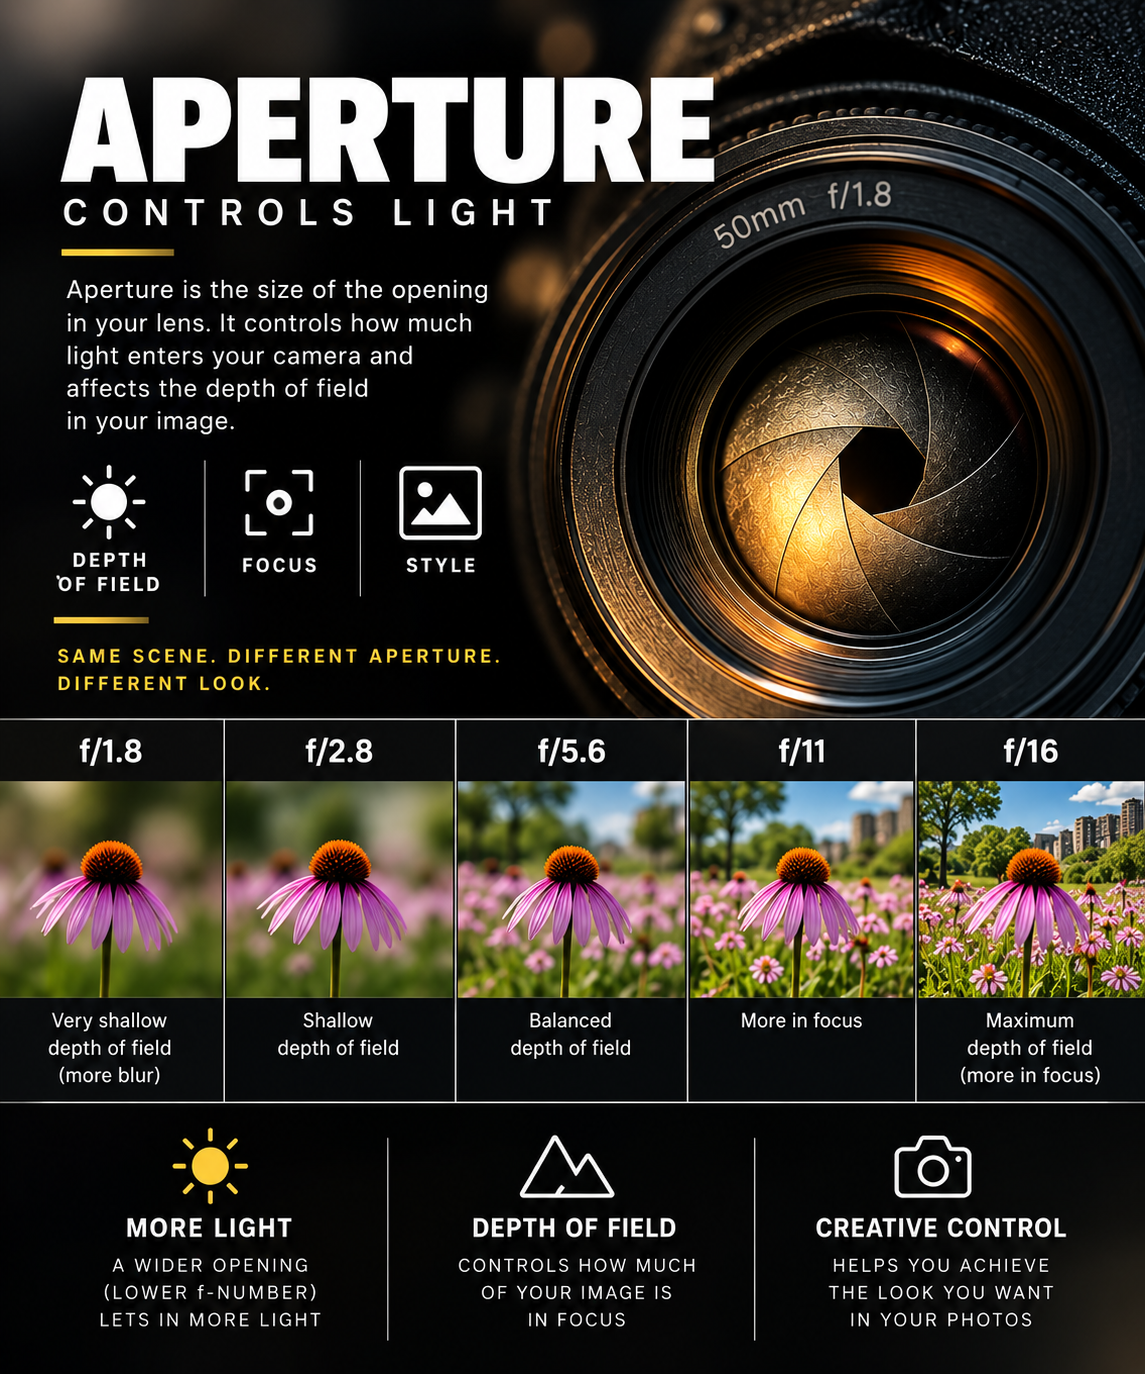
Aperture - How does the lens control light and depth?
Students will learn how aperture controls the amount of light entering the camera and influences how much of a photograph appears in focus. They’ll learn what "f-stops" are and explore the differences between wide and narrow apertures.
Students will discover how aperture affects depth of field, background blur (bokeh), and why settings such as f/1.8 and f/8 can produce dramatically different-looking images.
Through hands-on exercises, students will photograph the same subject at several different apertures, giving them the opportunity to see how changing the aperture affects both exposure and the appearance of the image.
Students will begin connecting exposure with creativity. Instead of simply asking, “Is my picture bright enough?”, they’ll begin asking, “What do I want this picture to look like?”
The goal of Week 3 is to help students understand that aperture the creative tool for controlling light, focus, and the overall look and feel of a photograph.
Week 4
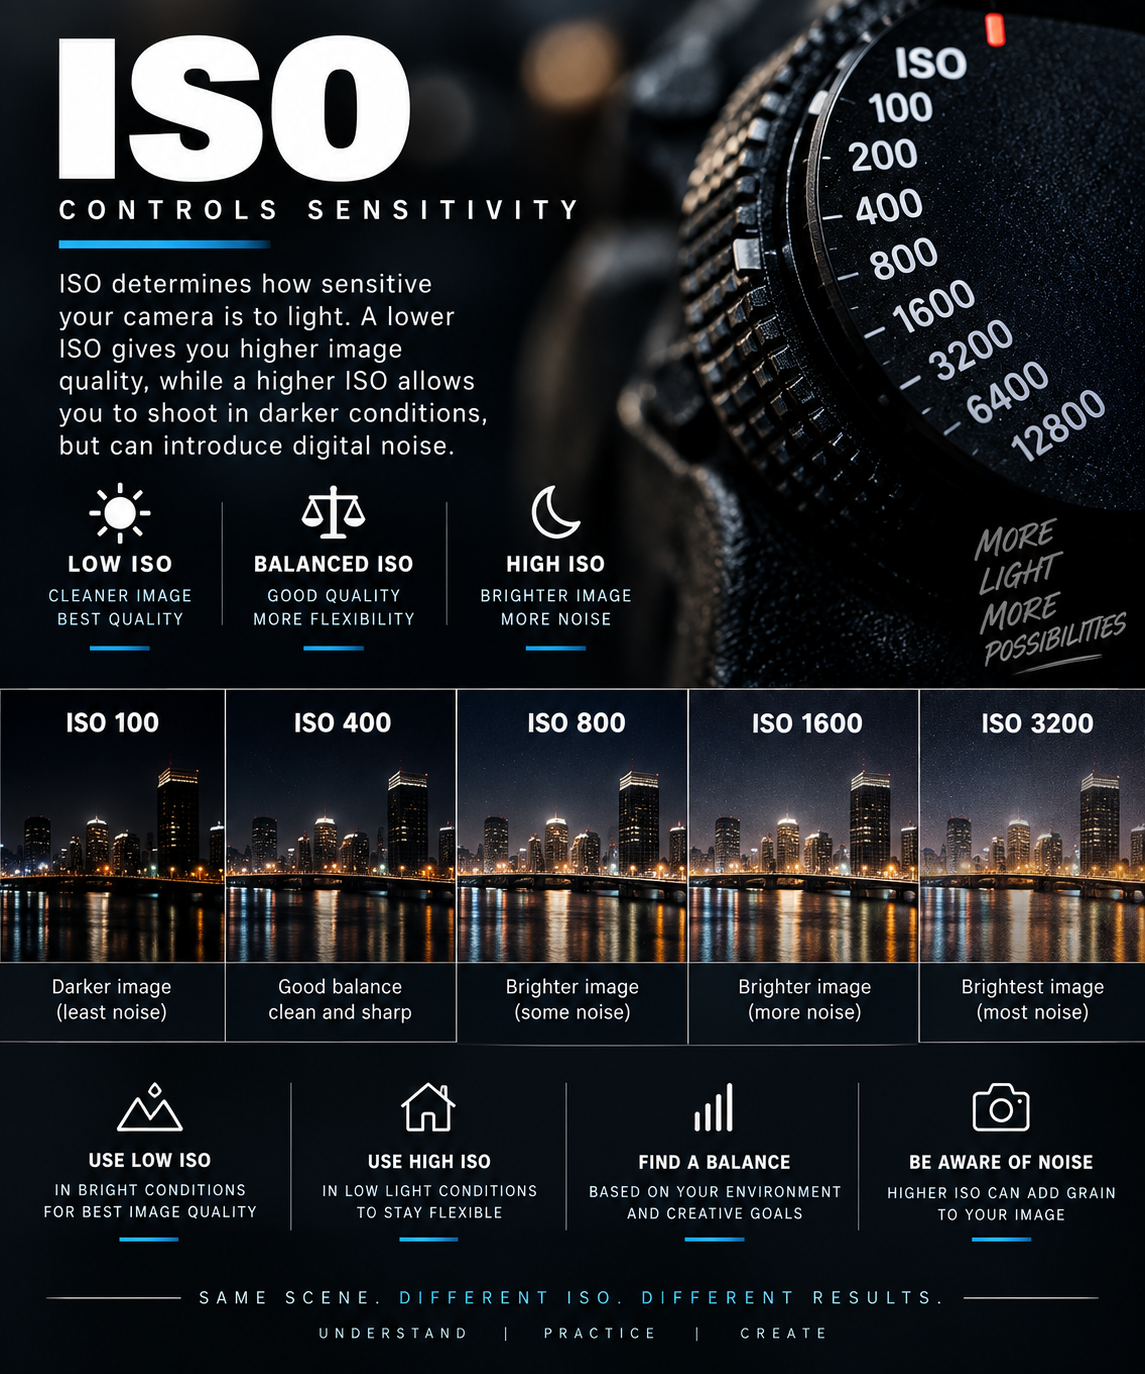
Understanding ISO -How sensitive is the camera to light?
“International Organization for Standardization”
Students will learn how ISO affects the camera’s sensitivity to light and how it can be used when photographing in different lighting conditions. They will explore the differences between low and high ISO settings and learn how increasing ISO can help in low-light situations while potentially introducing digital noise (GRAIN when using film) into an image.
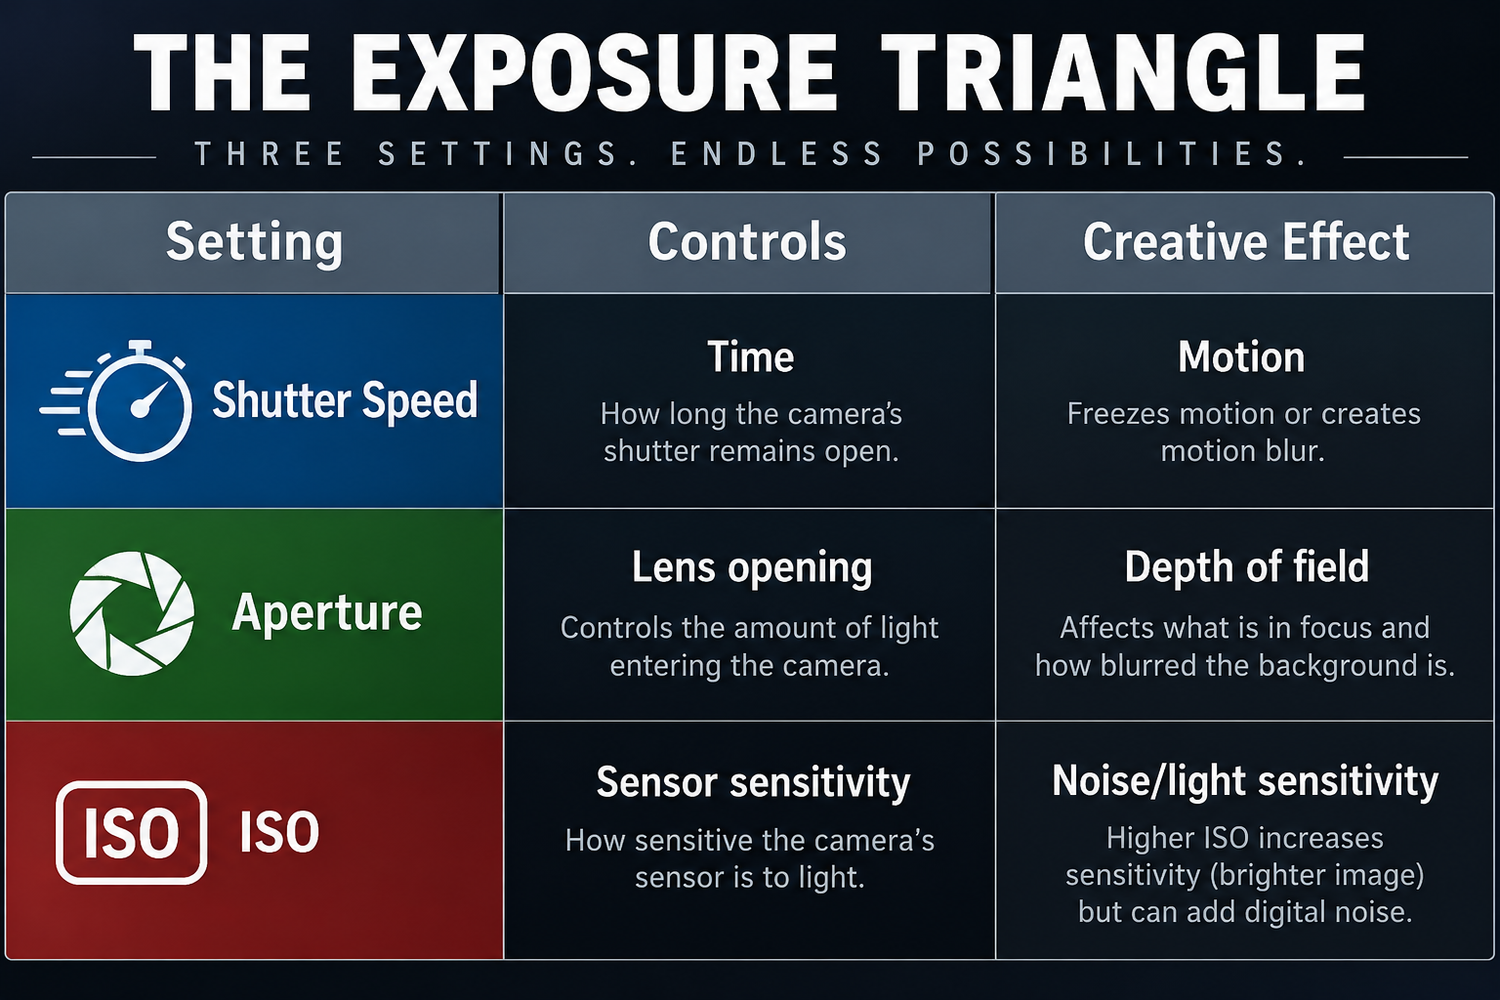
Students will also learn how to balance ISO with shutter speed and aperture to create a properly exposed photograph.
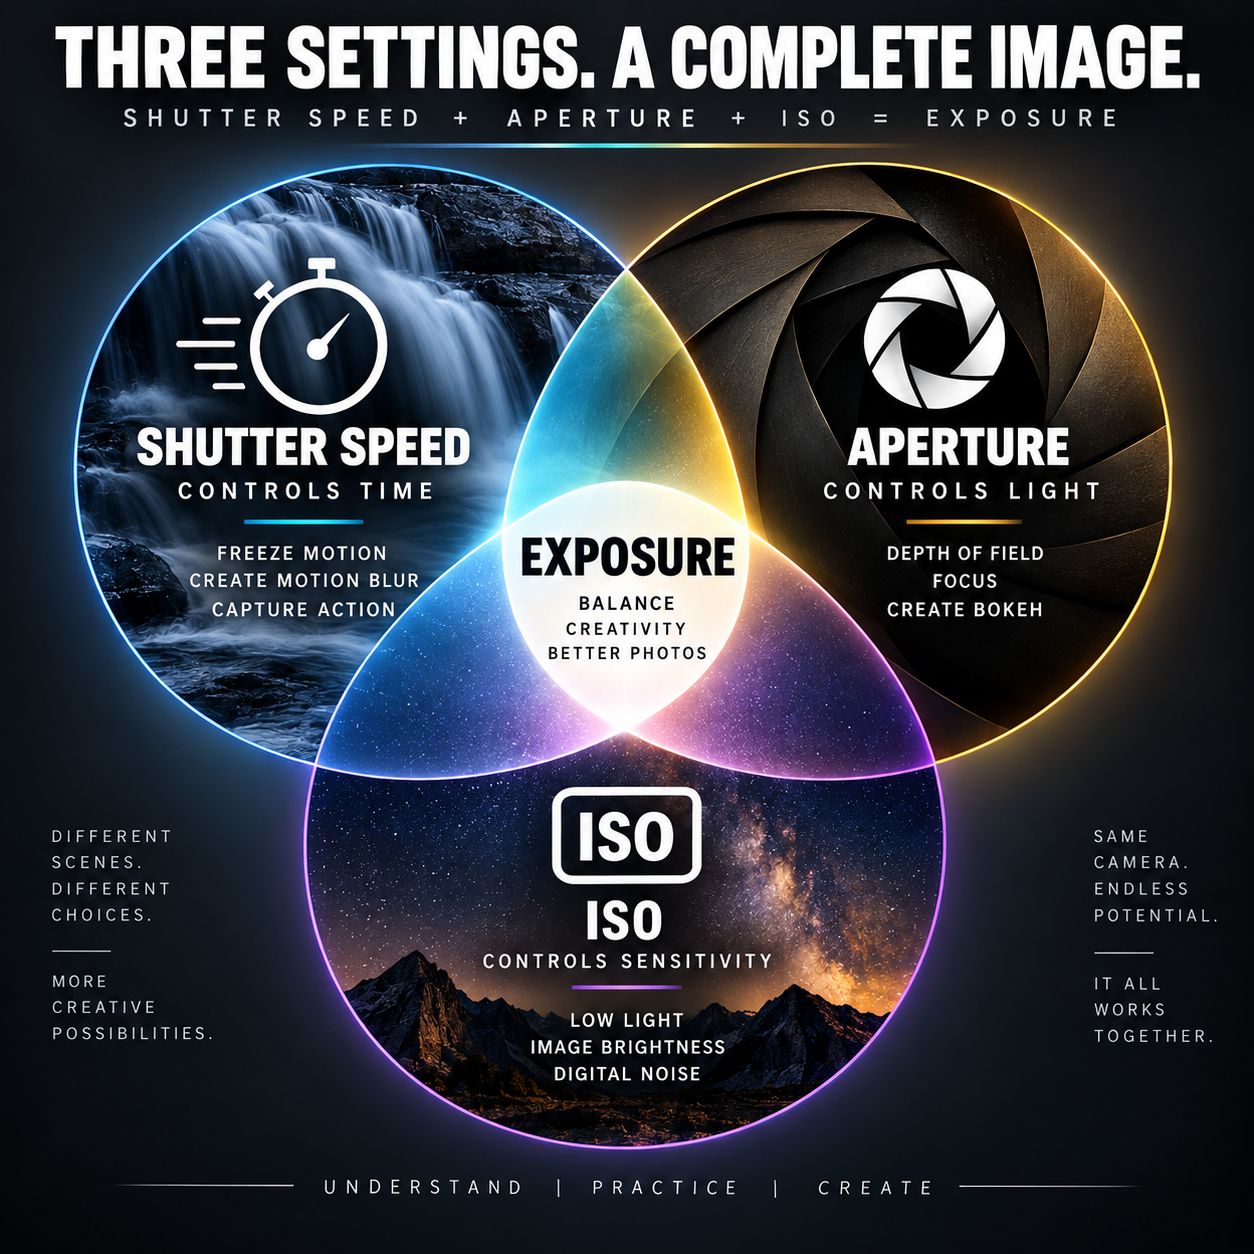
By this point in the course, students will begin bringing the three fundamental exposure settings together:
Shutter Speed, Aperture, and ISO.
Through hands-on exercises, students will photograph the same or similar subjects using different ISO settings and observe how each setting affects the final image.
The goal of Week 4 is to help students understand that ISO is another creative decision that works together with shutter speed and aperture to control exposure.
This is where students will understand the Exposure Triangle.
Week 5
Putting it all together
Students will begin putting everything they have learned into practice by working with their cameras in Manual Mode. They’ll use their understanding of shutter speed, aperture, and ISO together to control exposure and intentionally create different photographic effects.
This will be a hands-on, workshop-style class where students complete a series of photography challenges, including freezing motion, creating motion blur, achieving a shallow depth of field, photographing in low-light conditions, and creating properly exposed images using Manual Mode.
Students will learn that there is not just one “correct” camera setting. Instead, they’ll begin making intentional decisions based on the subject, lighting conditions, and the creative look they want to achieve.
The goal of Week 5 is to give students the confidence to move beyond automatic settings and begin taking control of their camera and making creative decisions as photographers.
Week 6
Your Photography Journey
Students will bring together everything they have learned throughout the course by selecting 3–5 of their favorite photographs from the previous weeks. They’ll have an opportunity to share their work, explain what inspired each photograph, discuss the camera settings they used, and consider what they might do differently.
The class will explore and discuss areas of photography, including portrait, fashion, landscape, wildlife, sports, street, architecture, automotive, product, concert/event, nature, travel, and photojournalism. This will help students discover the types of photography that interest them and identify areas they may want to explore further.
The goal of Week 6 is to help students recognize that photography is a way to express creativity, tell stories, explore the world, and to develop a lifelong skill or career.